I will not describe the registration procedure on Displate since if you are asking how to upload AI art on Displate, it means you already have an account but are facing some difficulties.
This tutorial is for you.
After logging in, hover your mouse over your profile picture in the top right corner. From the dropdown menu, select “Upload your artwork.”

On the opened page, you will see a convenient and intuitive uploader with prompts. If you haven’t worked with Displate before, you won’t feel thrilled about this new uploader. The old one was not very user-friendly. The new one, equipped with AI technologies, significantly speeds up the attribution of uploaded content.
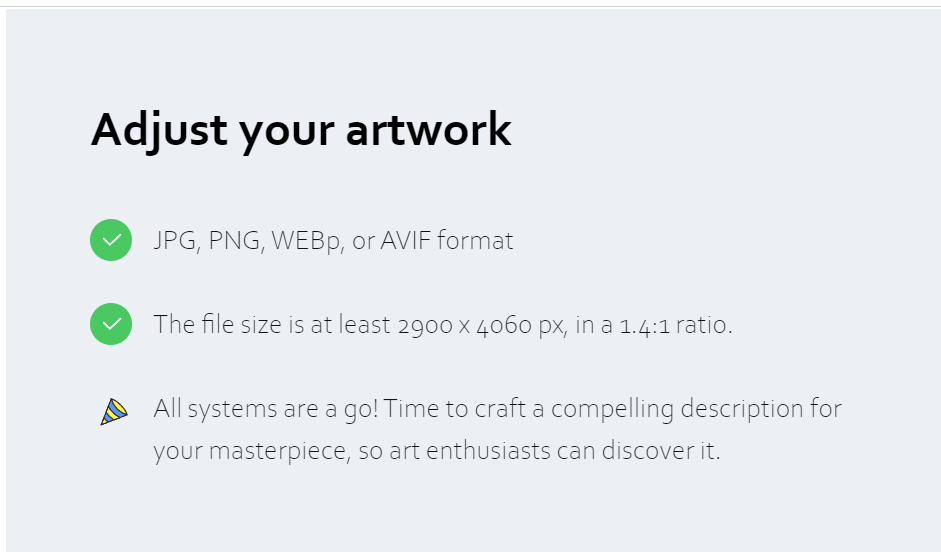
To upload, drag an image from your computer/tablet folder onto the area labeled “Drag and drop an image or Browse.” Below this label is brief information about the types of files accepted and requirements, copyright protection, and other legal information. For in-depth information, follow the link to the Uploader Guide.
I currently don’t have any AI art ready for upload, so I will demonstrate using a photograph. The principle is the same. Below, I will provide examples of AI art created in Midjourney that have been approved by Displate.
I will upload a photograph taken in 2023 during my vacation in Mamaia, Constanța, Romania.
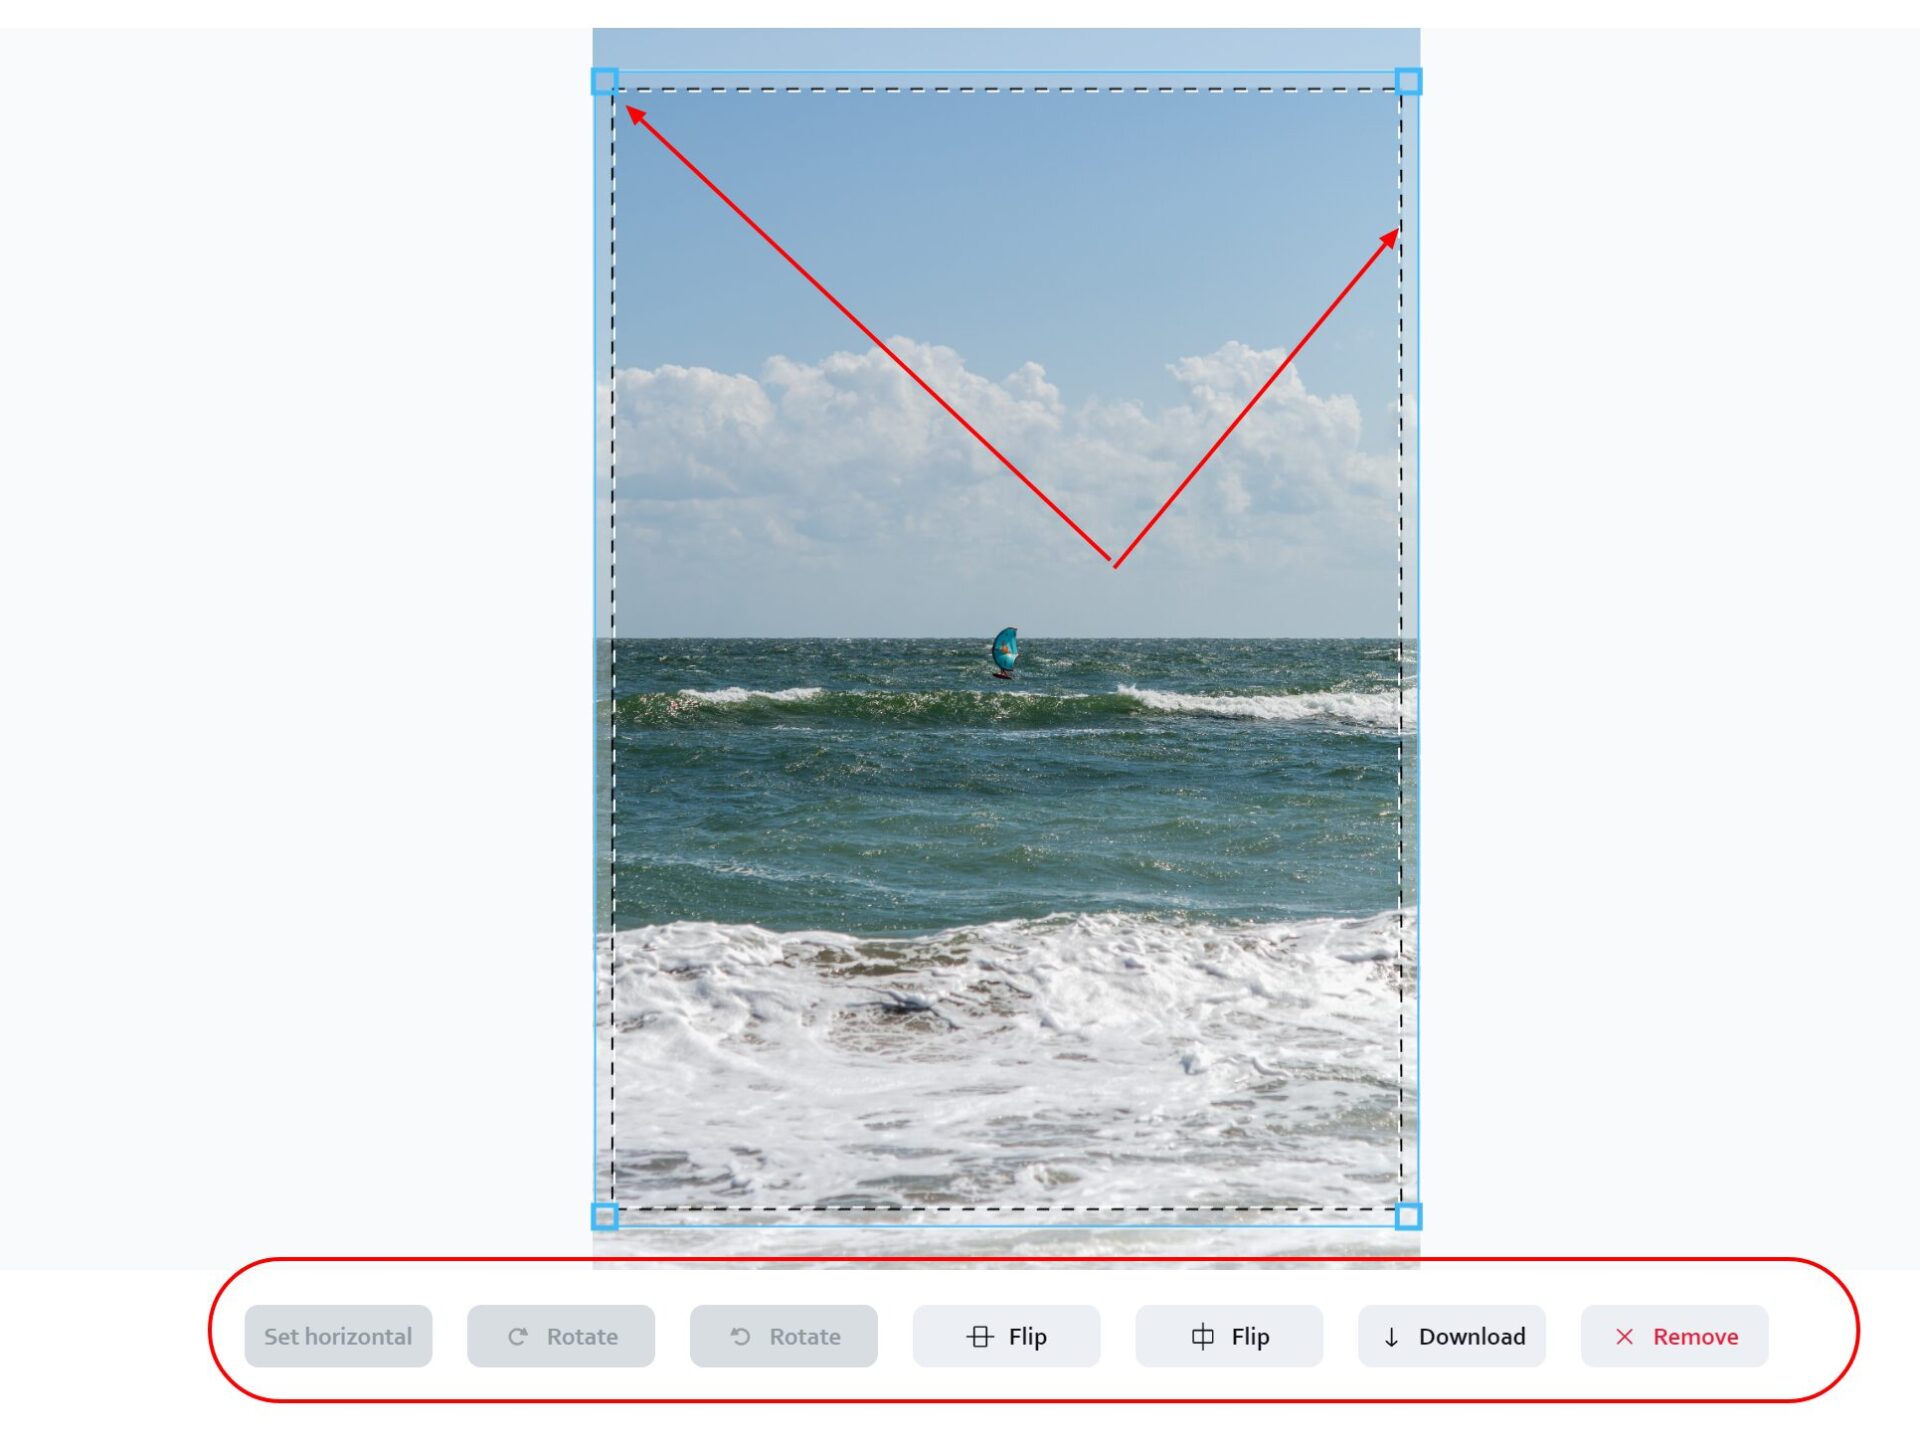
After uploading, we can edit the photo/image:
- Set horizontal – applicable to large images
- Rotate left or right – also available only for large frames
- Flip horizontal or vertical
- Download or Remove
Using the cropping grid, we can crop our image according to the rule of thirds by placing the main object on one of the points of attraction.
The built-in AI technology determines if everything is okay with your file. It automatically checks the file extension and format for compliance with requirements. Success will be indicated by green checkmarks and an active blue “Next” button.
Now the magic begins! In just seconds, AI will determine what is depicted in the picture and suggest a Title and Description. If you are satisfied with the result, proceed to the next step. Alternatively, write your own Title and Description. You can also use prompts on how to write a unique title and description. Links to guides are highlighted under the advising fields in blue.
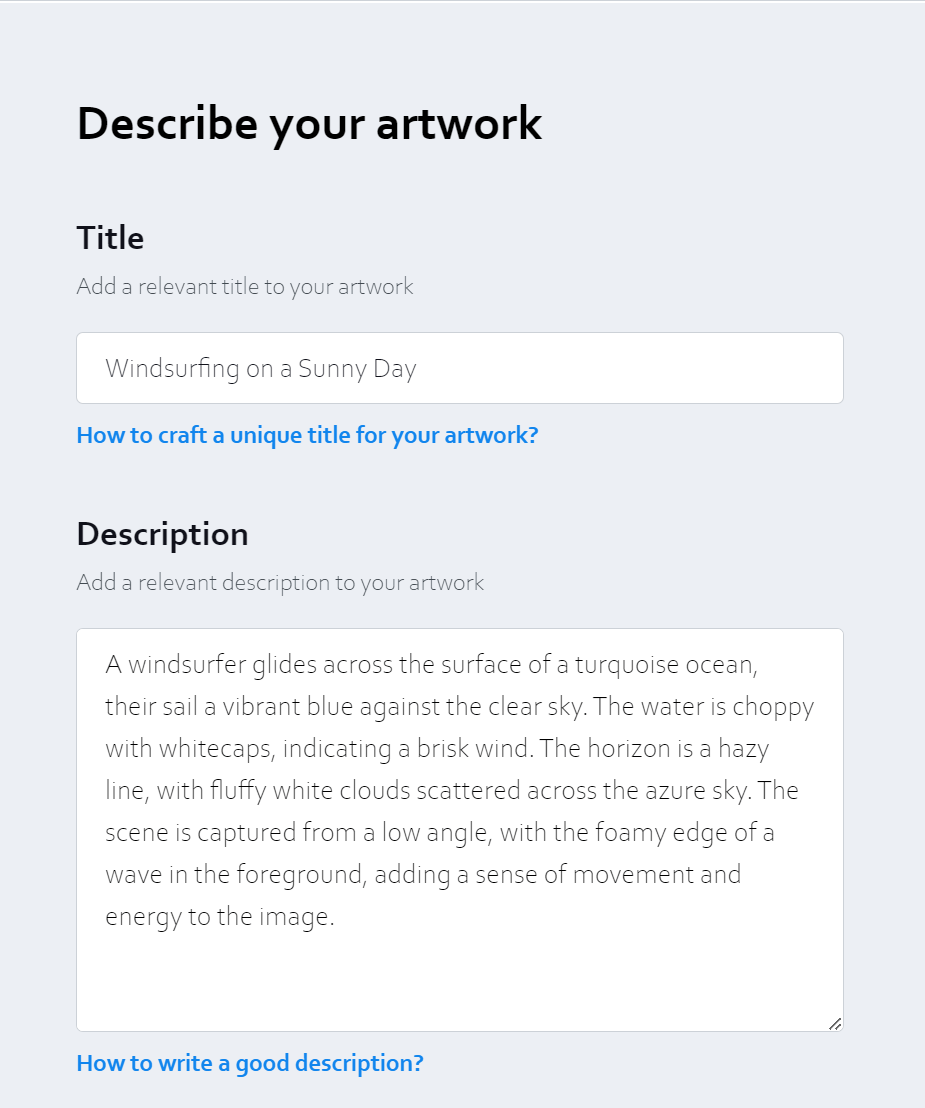
I am satisfied with how AI described what is happening in the photograph. Now I need to choose the type of content being uploaded:
- 3D modeling
- Blueprint
- Collage
- Digital Art
- Drawing
- Illustration
- Painting
- Photography
When uploading AI art, you must select “Digital Art.” Check the appropriate option and click the next blue button to proceed to a page where AI has kindly suggested suitable Tags. Each work, regardless of its type, can have a maximum of 15 tags assigned to it. To add new tags, click on “+Add tag.” I recommend reading “How to choose the best tags?” by following the link under tags.
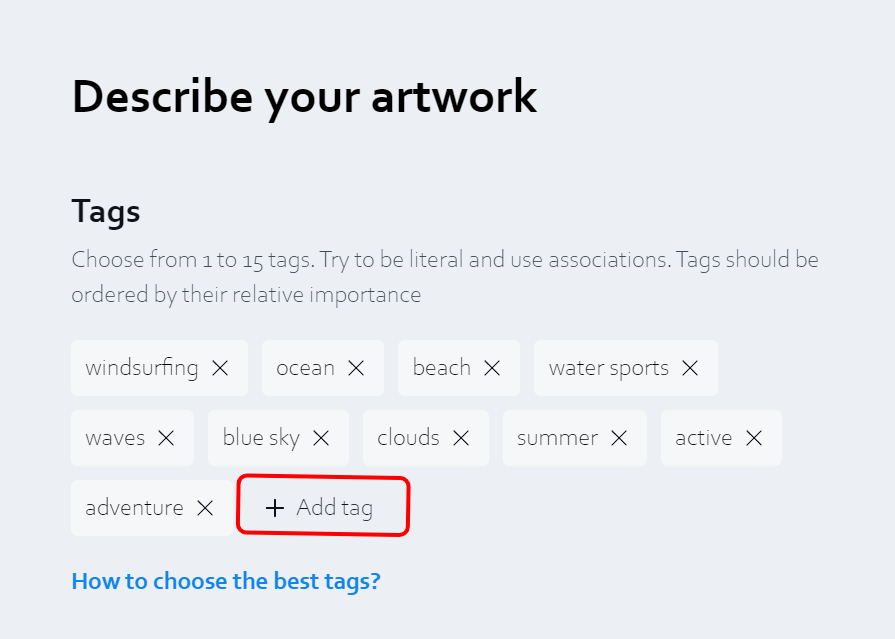
When you click “+Add tag,” an input field becomes active. Type in your tag and press Enter on your keyboard or click anywhere in the gray area next to the tags. After doing all this, click “Next” in the bottom right corner of your browser.
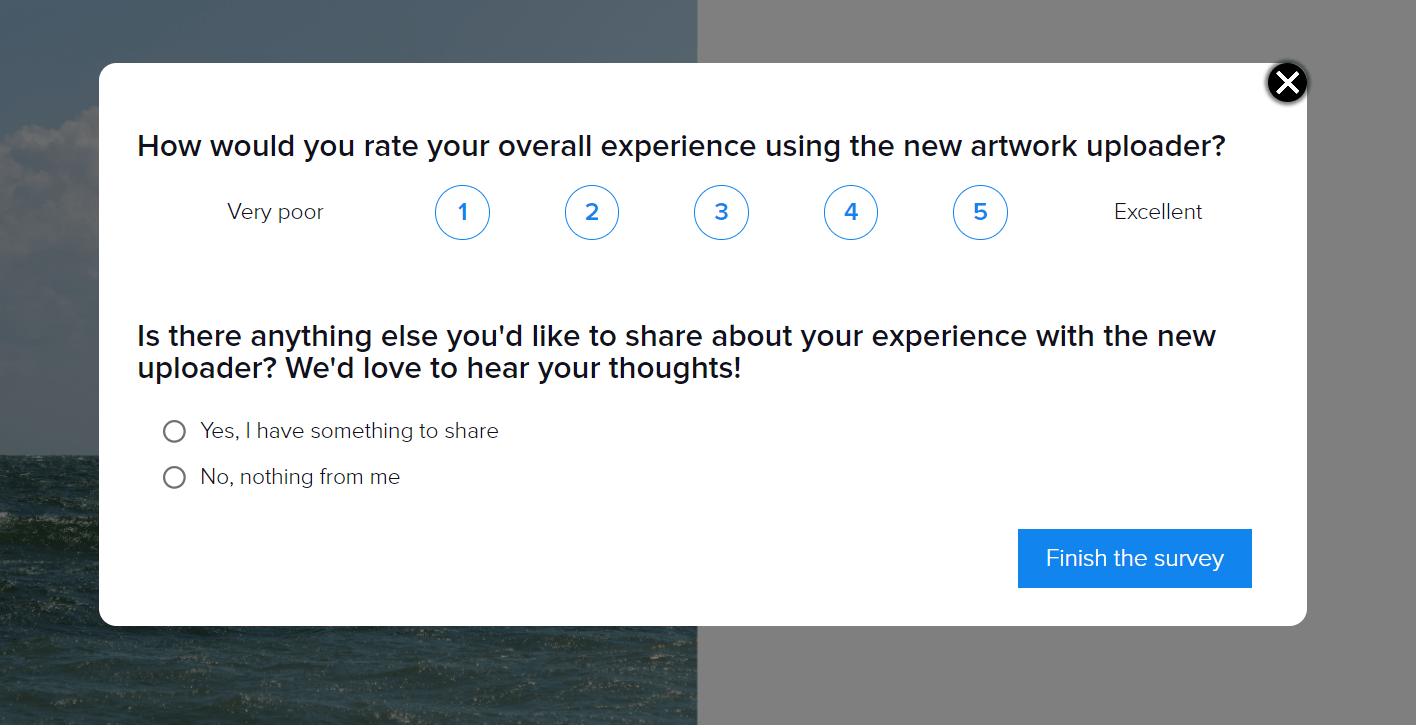
At this step, you may be prompted in a pop-up window to rate your experience with the new uploader: “How would you rate your overall experience using the new artwork uploader?” I’m absolutely thrilled and give it a top score. To be honest, the old uploader stressed me out so much that sometimes just thinking about filling out all those fields discouraged me from uploading new works. But now everything is different; thanks a lot to the developers.
Now we click “Next” one last time and either start uploading a new work or go back to our profile.
You will receive an email notification about whether your work has been accepted for sale or not. Hmm, wait; I don’t even remember if I get such notifications. LOL. I always check my Upload History for status updates.
Well, now you know how to upload AI art to Displate and how to work with the new uploader.